1 Open Intune Applications
Log in to SoftwareCentral, then open the page from the menu.
| Step | What to do |
|---|---|
| 1 | Log in to SoftwareCentral. |
| 2 | Click Applications in the top bar. |
| 3 | Under the Applications menu, click Intune Applications. |
| 4 | The Intune Applications page opens, where you manage your applications. |
To work with the list, your security role needs the matching rights. Items you may not use are hidden or disabled on this page: for example, the Create Win32 app button is shown only to roles that may create applications.
2 The application list
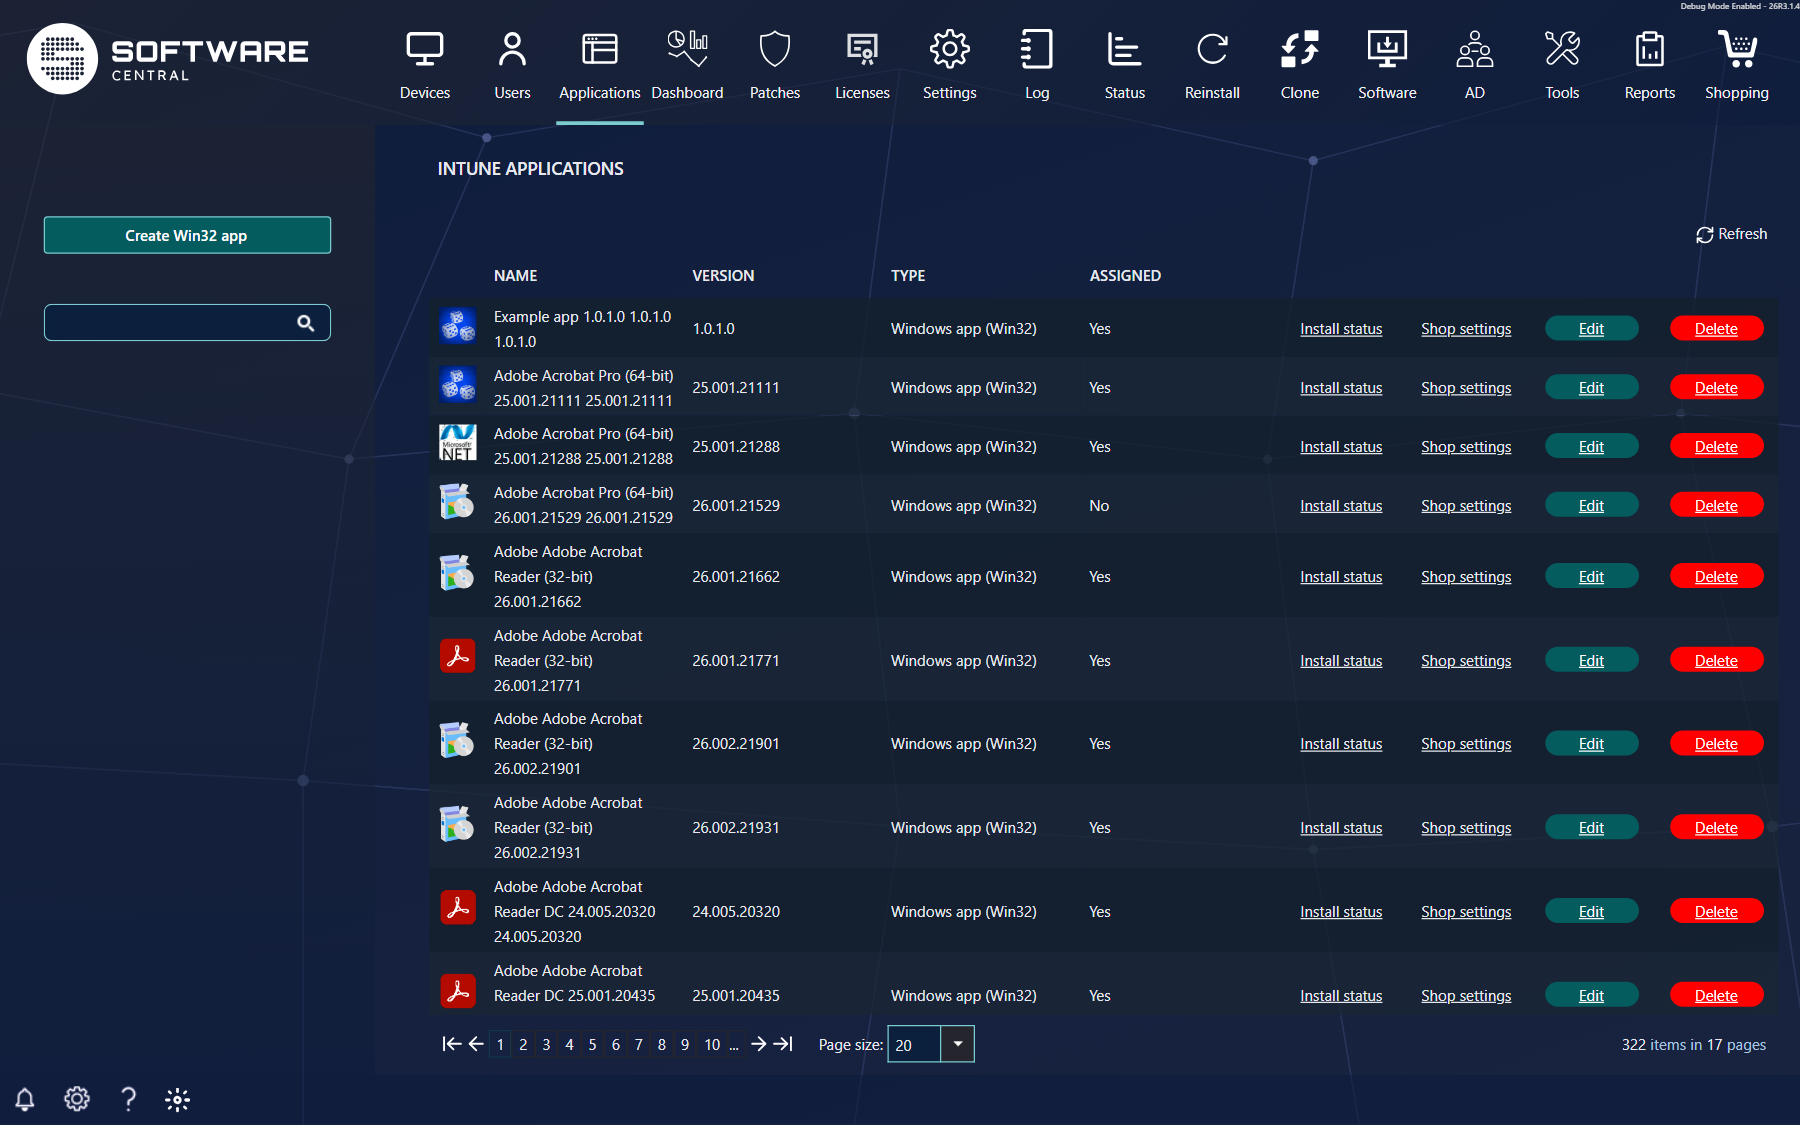
The page lists every application in the Intune tenant you are working in.
Each row shows the application Name, its Version, its Type (for example Windows app (Win32)) and whether it is Assigned. The links at the right of a row open the windows for that application. Each link is shown only if your role may use it: Install status, Shop settings, Edit and Delete.
Use the search box on the left to find an application: type a name and press Enter. Use Refresh above the list to reload it, for example after you create an application.
3 Create a Win32 app
The “Create Application” function creates an application in just three steps: Template, Source and Info. Then you click Create.
To start, click Create Win32 app on the left. The Create Application window opens on the first step.
Step 1: Template
In this step you choose a template with predefined settings for the application. Follow the instructions below:
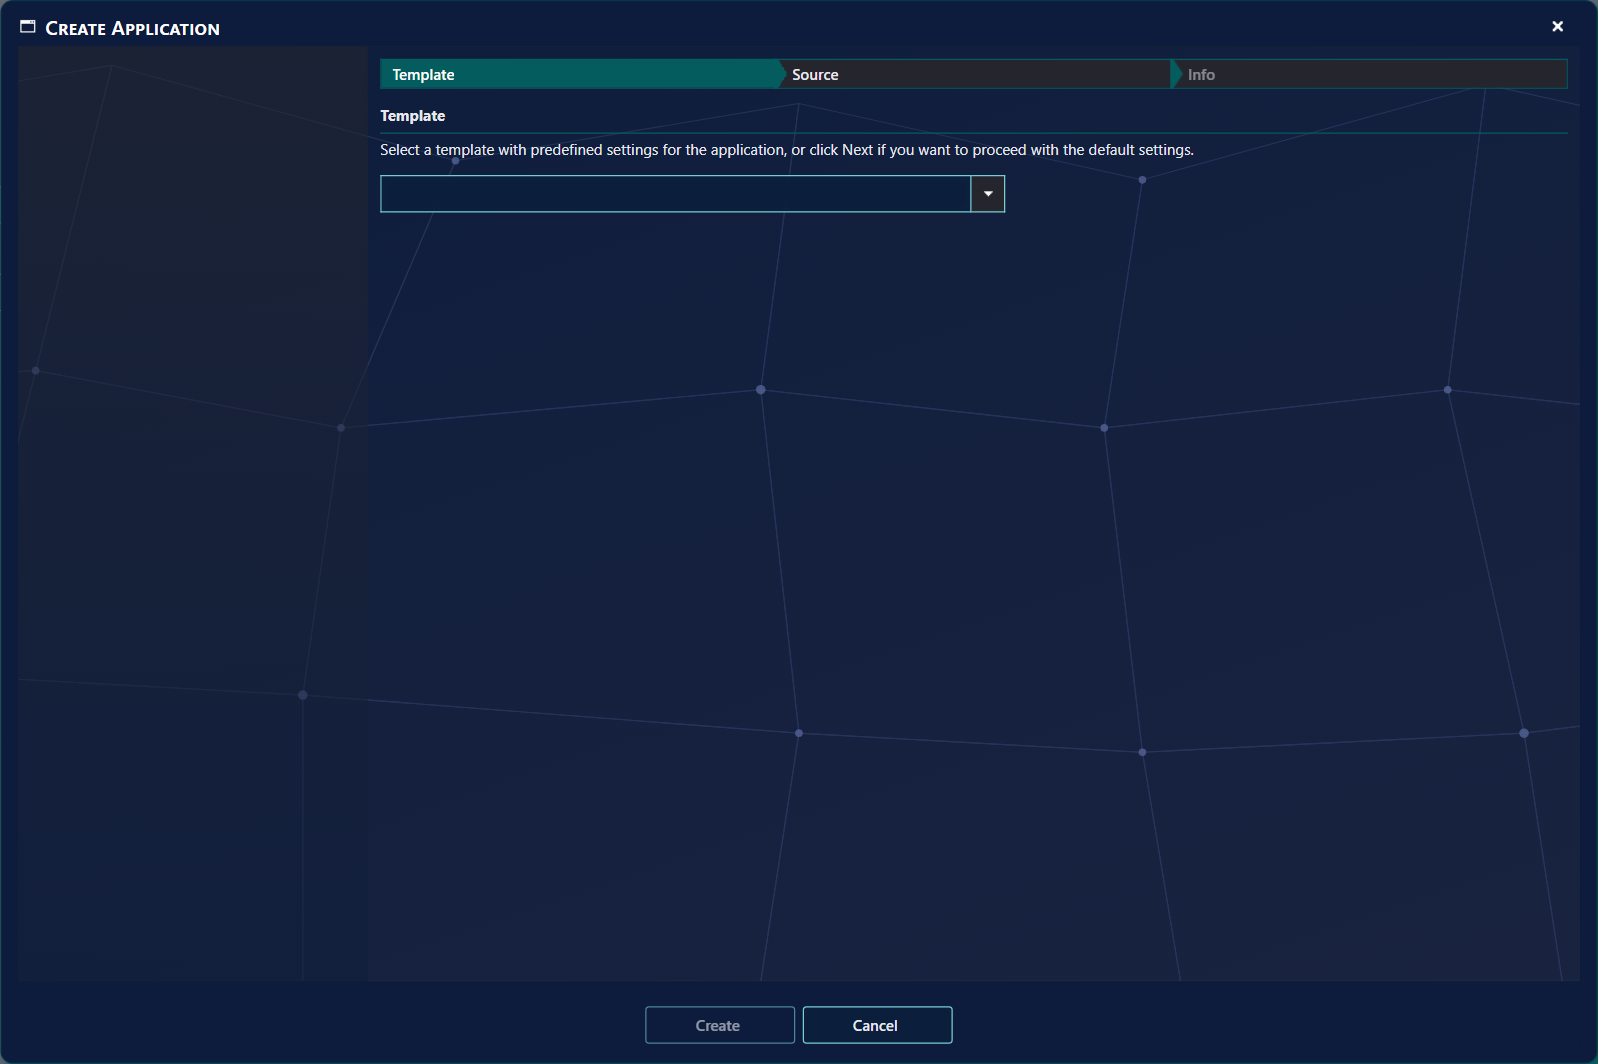
- Open the drop-down box and choose the template that best suits the application. A template sets the commands, return codes, requirements and tenants for the application; see Intune Application Templates.
- To use the default settings, leave the box empty.
- Go on to the Source step. Click Source in the step bar at the top of the window, or click Next if the window shows it.
Step 2: Source
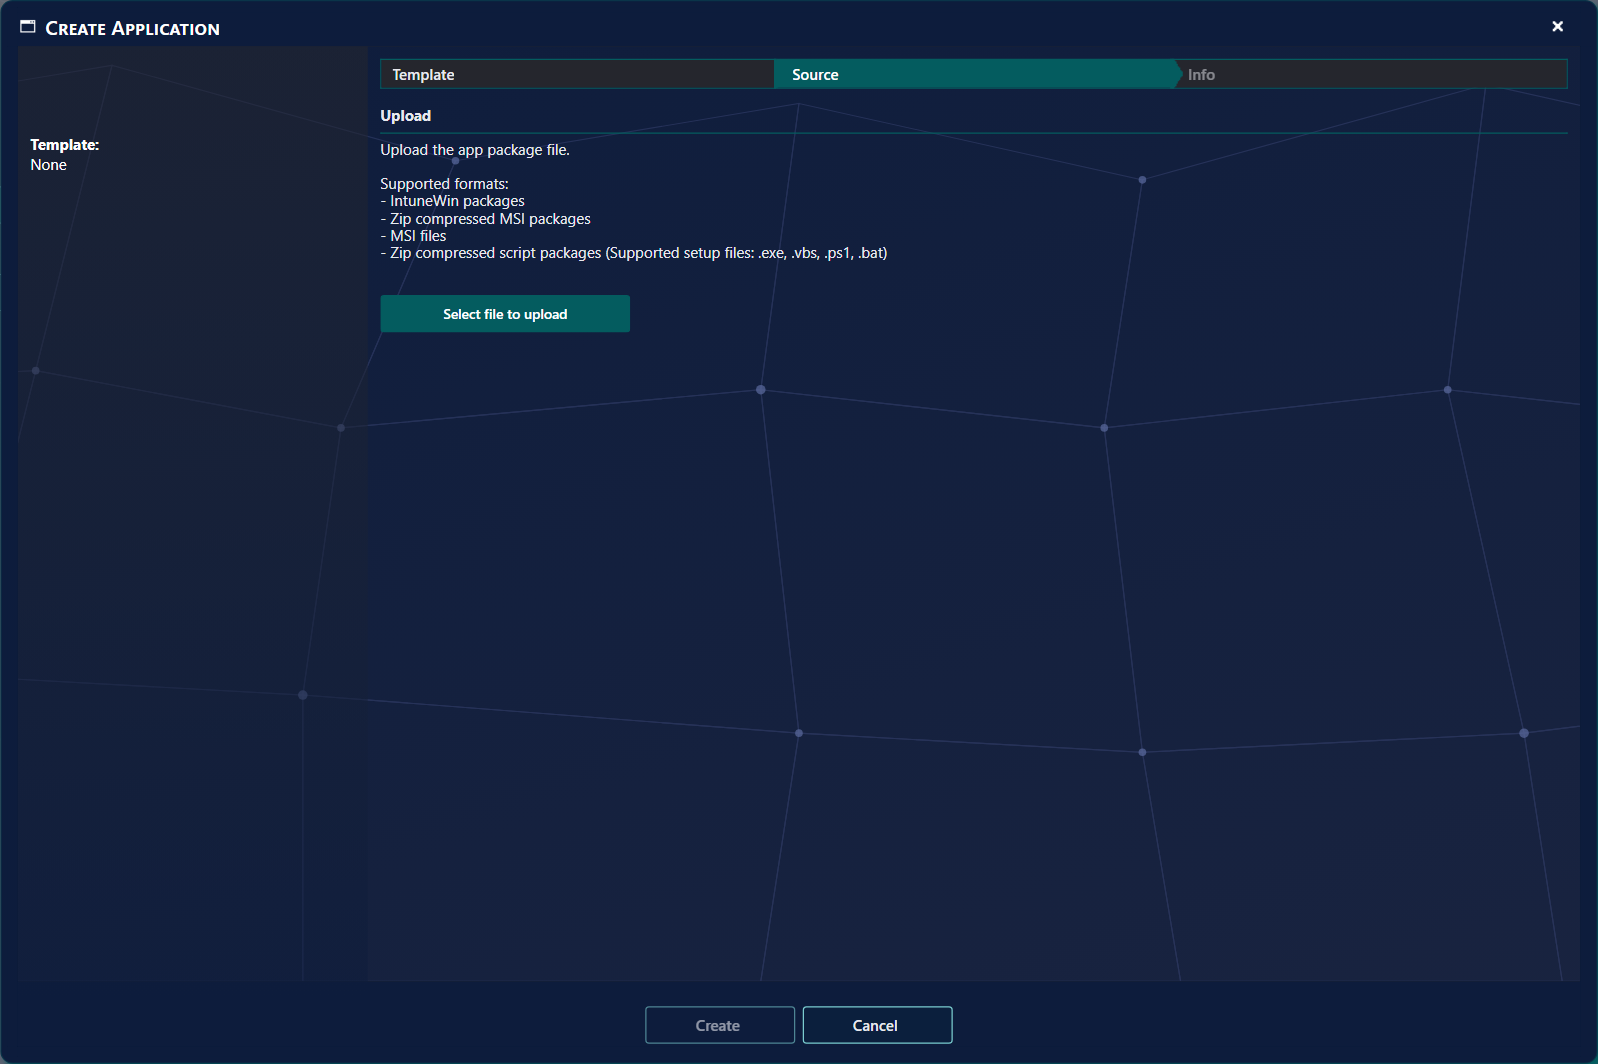
In this step you upload the package for the application. Follow the instructions below:
- Click Select file to upload, or drag the file onto the area. Browse to the file and select it. Only one file is uploaded at a time.
- Supported file types include:
- IntuneWin packages: used as they are.
- Zip compressed MSI packages: SoftwareCentral packs the zip into an IntuneWin package.
- MSI files: SoftwareCentral packs the file into an IntuneWin package.
- Zip compressed script packages (supported setup files:
.exe,.vbs,.ps1,.bat): SoftwareCentral finds the setup file in the zip and packs the package.
- Wait while the upload and the processing windows run. The Uploading... and Processing uploaded file... windows close when the package is ready.
Step 3: Info
In this step, the window fills in as much as it can from the package and the template. You may need to change only some details. Follow the instructions below:
- Review the filled-in details: Name, Publisher, Version, Description, the icon, the Install command and the Uninstall command, and the Detection rules.
- Fill in any field that is missing or wrong. The fields marked with a star are required: Name, Publisher, Description, Install command and Uninstall command. A detection rule is also required.
- Double-check all the information.
- When you are satisfied, click Create to complete the process. The Create button is greyed out until the package has been read.
- The application is created in the background. The window closes, and the application is not in the list straight away. Click Refresh after a while.
If the template names other Intune tenants, the application is created on those tenants as well as on the tenant you have selected. The name must not already exist on the tenant (see Troubleshooting).

4 Edit an application
The “Edit Application” function changes the settings and details of an existing application.
Step 1: Open the application
- In the application list, find the application you want to edit.
- Click its name, or click Edit on its row. The Edit window opens.
Step 2: Change the settings
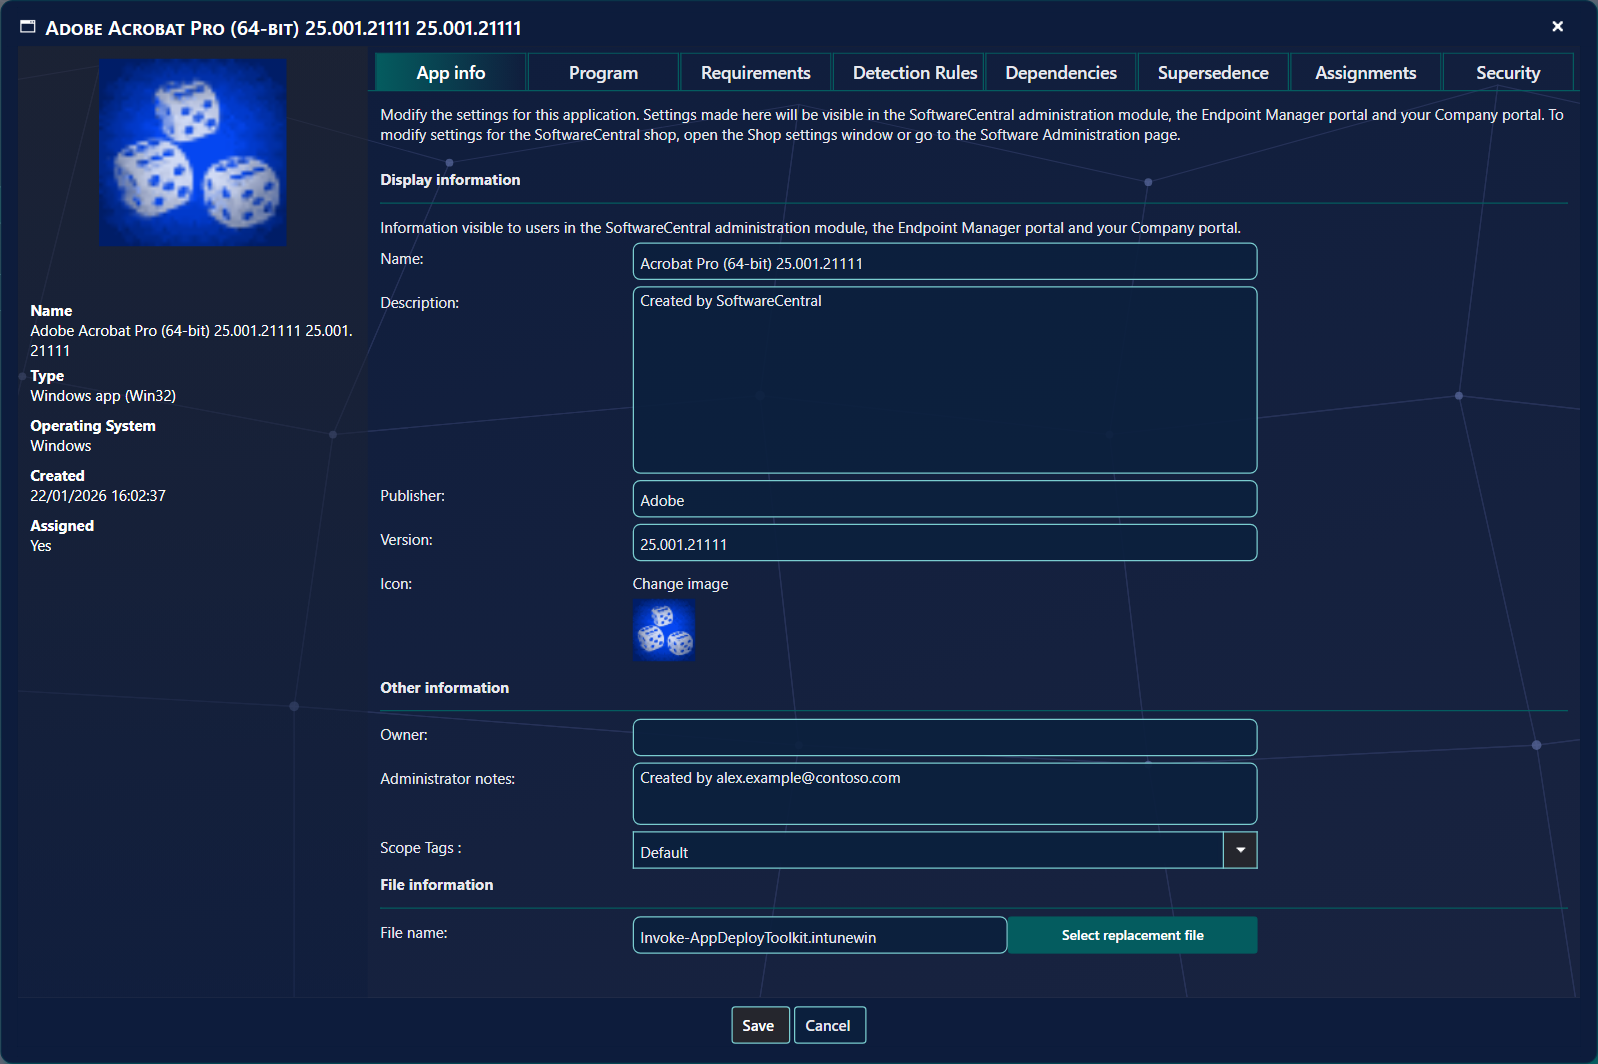
The window has these tabs. Review the settings in each tab that you need to change:
| Tab | What it holds |
|---|---|
| App info | Name, Description, Publisher, Version and the icon (Change image). Also Owner, Administrator notes, Scope Tags and the file name. Select replacement file is shown only to roles that may update the package. |
| Program | The install and uninstall settings of the application. |
| Requirements | The requirements devices must meet before the application is installed. |
| Detection Rules | The rules that detect whether the application is present on a device. |
| Dependencies | Applications this application depends on. |
| Supersedence | Applications this application supersedes, or that supersede it. |
| Assignments | The groups the application is deployed to. Assigning and unassigning change Intune. |
| Security | The Package Security Groups and their security roles that have permission for this application. Tick the groups to change them. |
To change the shop settings of the application, open Shop settings on its row, or go to the Software Administration page. The Edit window does not change them.
Step 3: Save the changes
- When you have finished, review the changes.
- If everything is correct, click Save.
- Wait until the changes are saved. The window closes, and the application list shows the changes.
5 Delete an application
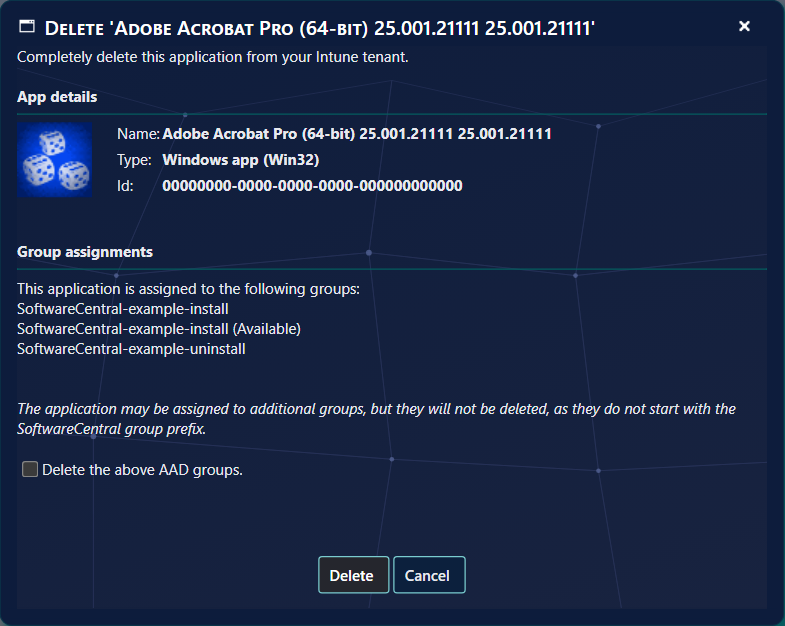
The “Delete Application” function removes an application from Intune and from SoftwareCentral.
Step 1: Select the application
- In the application list, find the application you want to delete.
- Click Delete on its row. The Delete window opens.
Step 2: Review the application
- In the Delete window, check the application name, its type and its Id, to make sure it is the right one.
- Look for the section Group assignments.
- Take note of the groups listed. They are the SoftwareCentral groups the application is assigned to. Other groups the application is assigned to are not listed, and they are not deleted.
Step 3: Delete the application
- To delete the groups listed with the application, tick Delete the above AAD groups. To keep them, leave it unticked.
- Click Delete to proceed with the deletion.
- Wait for the deletion to complete. The window closes and the application is removed from the list.
6 Installation status
The installation status shows how the application is doing on devices and for users.
Open the installation status window
- Find the application in the list.
- Click Install status on its row.
- A new window opens with the installation status of the application.
Read the installation status window
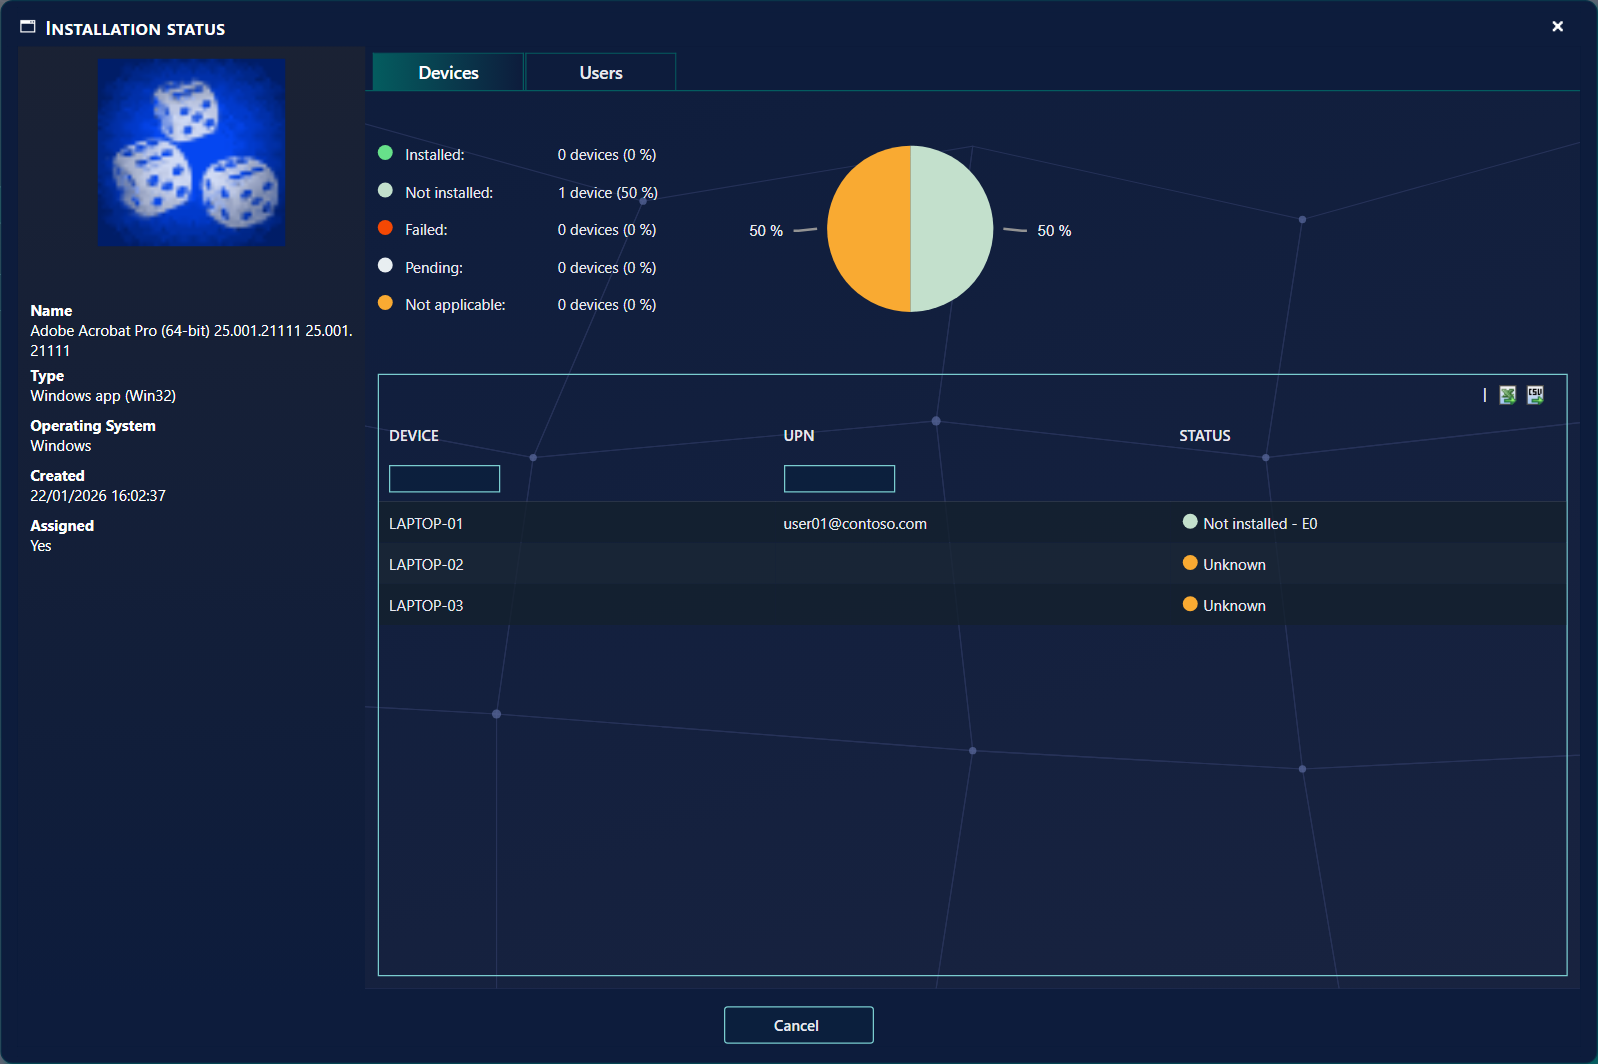
The window shows the application's name, type, operating system, created date and whether it is assigned, on the left. On the right, the window has a pie chart and two tabs:
- Pie chart and legend: the share of devices, or of users on the Users tab, in each status. The statuses are Installed, Not installed, Failed, Pending and Not applicable. Each has a count and a percentage. The pie chart shows a quick overview of the spread, and helps you spot where to look.
- Devices tab: the devices the application is assigned to, with the columns Device, UPN and Status.
- Users tab: the users the application is assigned to, with the columns Name, UPN, Installs, Failures and Pending. The number of devices a user has with the application installed, failed or pending is shown in these columns. The Not Installed and Not Applicable columns are hidden by default.
Work with the window
- Sort and filter: click a column heading to sort. Type in the box under Device or UPN to filter the rows.
- Export: use the CSV or Excel icon above the grid to export the rows for further analysis or reporting. The export covers all rows, not only the page you see.
- Cancel: click Cancel to close the window and return to the application list.
7 Best practice
- Create from a template that matches the kind of installer. The template sets the commands, return codes, requirements, tenants and Package Security Groups, so each application gets the same settings. See Intune Application Templates.
- Check the commands before you click Create. SoftwareCentral checks only that the install and uninstall commands are not empty, not that they work. Test them on a device first.
- Give every application a detection rule. The application cannot be created without one, and a detection rule is how Intune decides the application is installed.
- Read Group assignments before you delete. Only groups whose name starts with the SoftwareCentral group prefix are listed and can be deleted. Groups with other names stay in Intune. Deleting also removes the application's SoftwareCentral data (see the note in section 5).
- Do not create the same application twice. The name must be unique on the tenant. After you click Create, wait and use Refresh.
8 Troubleshooting
| Symptom | Cause | What to do |
|---|---|---|
| “Unsupported file format 'name'.” after you select a file | The file is not an IntuneWin package, a zip, or an MSI file. | Select a supported file. See Step 2 in section 3. |
| “Failed to create intunewin package.” | SoftwareCentral could not pack the file. This also happens when the zip contains no supported setup file (.exe, .vbs, .ps1 or .bat, or an MSI). | Check that the zip contains a supported setup file, then upload it again. The details are in the Log. |
| “Additional information is required before the application can be created:” followed by “A display name is required.”, “A publisher is required.” or “A description is required.” | A required field on the Info step is empty. | Fill in the field and click Create again. |
| “Install command line is missing.” or “Uninstall command line is missing.” | The install or uninstall command is empty. | Enter the command, then click Create. |
| “A detection method must be configured.” | There is no detection rule. | Add a detection rule in the Detection section, then click Create. |
| “An application with this display name already exists.” or “An application on Intune tenant 'name' with this display name already exists.” | An application with this name already exists on the tenant (on the named tenant when the template creates on several). | Choose a different name. |
| “Failed to create application.” | An unexpected error happened while the application was being prepared. | Check the Log for the details, then try again. |
| The new application is not in the list | The application is created in the background, so it appears after a short while. | Wait, then click Refresh. Do not create it again. |
| “Failed to load application. See the log for details.” in the Edit window | The application could not be read from Intune. | Check the Log for the details, then close the window and open it again. |
| “Applications of type 'type' are not yet supported.” in the Edit window | The application is of a type this window does not edit. Save is hidden. | Edit the application in the Intune admin centre. |
| “This type of application cannot be deleted.” in the Delete window | The application is a global store app, which cannot be deleted from SoftwareCentral. | Nothing to do here. The Delete button is hidden. |
| “Something went wrong. See the log for details.” in the Delete window | The delete did not complete in Intune. | Check the Log, then check in Intune whether the application still exists before you try again. |
| “No devices found.” or “No users found.” in the installation status window | No device or user has a status for the application yet. | Wait for Intune to report a status, then open the window again. |