1 Copy the new files
To update the PrestageComputer application in your boot image, copy the new files from the folder [SoftwareCentralInstallDirectory]\Tools\PrestageComputer\ to the share you defined during the installation.
The share is the one that the boot image uses. It is the Source directory on the Customization tab of the boot image, as described in Configuration.
2 Update the boot image
Then go to the ConfigMgr console and locate the boot image.
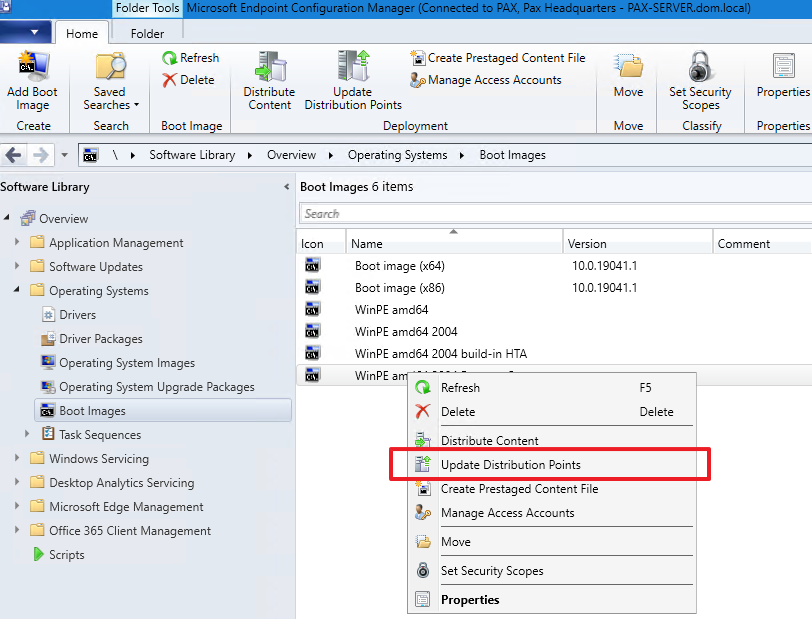
In the console, open Software Library › Operating Systems › Boot Images. The boot image that holds PrestageComputer is in this list.
Then click on Update Distribution Points and follow the wizard. You can use the button on the Home tab, in the Deployment group, or right-click the boot image and choose the same command.
3 Best practice
- Update the distribution points straight after you copy the files. Until the update reaches a distribution point, that point keeps serving the boot image it had before, so computers that start from it still run the old PrestageComputer files.
- Keep the share and the boot image source directory the same. The boot image uses the files in the share when it is updated. If you move the share, change the Source directory on the Customization tab first (see Configuration), and then update the distribution points.
- Prestage one test computer after the update, before you rely on the boot image for all unknown computers.
4 Troubleshooting
This page has no messages of its own. The messages that the PrestageComputer application shows during an import, and what to change for each one, are listed in the Troubleshooting section of Configuration.