1 The report list
Reports over all memberships granted to local groups through SoftwareCentral are made in the local group reports interface. Open it from the AD menu.
The list shows the name of each report. The search box above the list is a quick find by name, and each row has the links Edit, Delete and View Report. The Add new report button is above the search box.
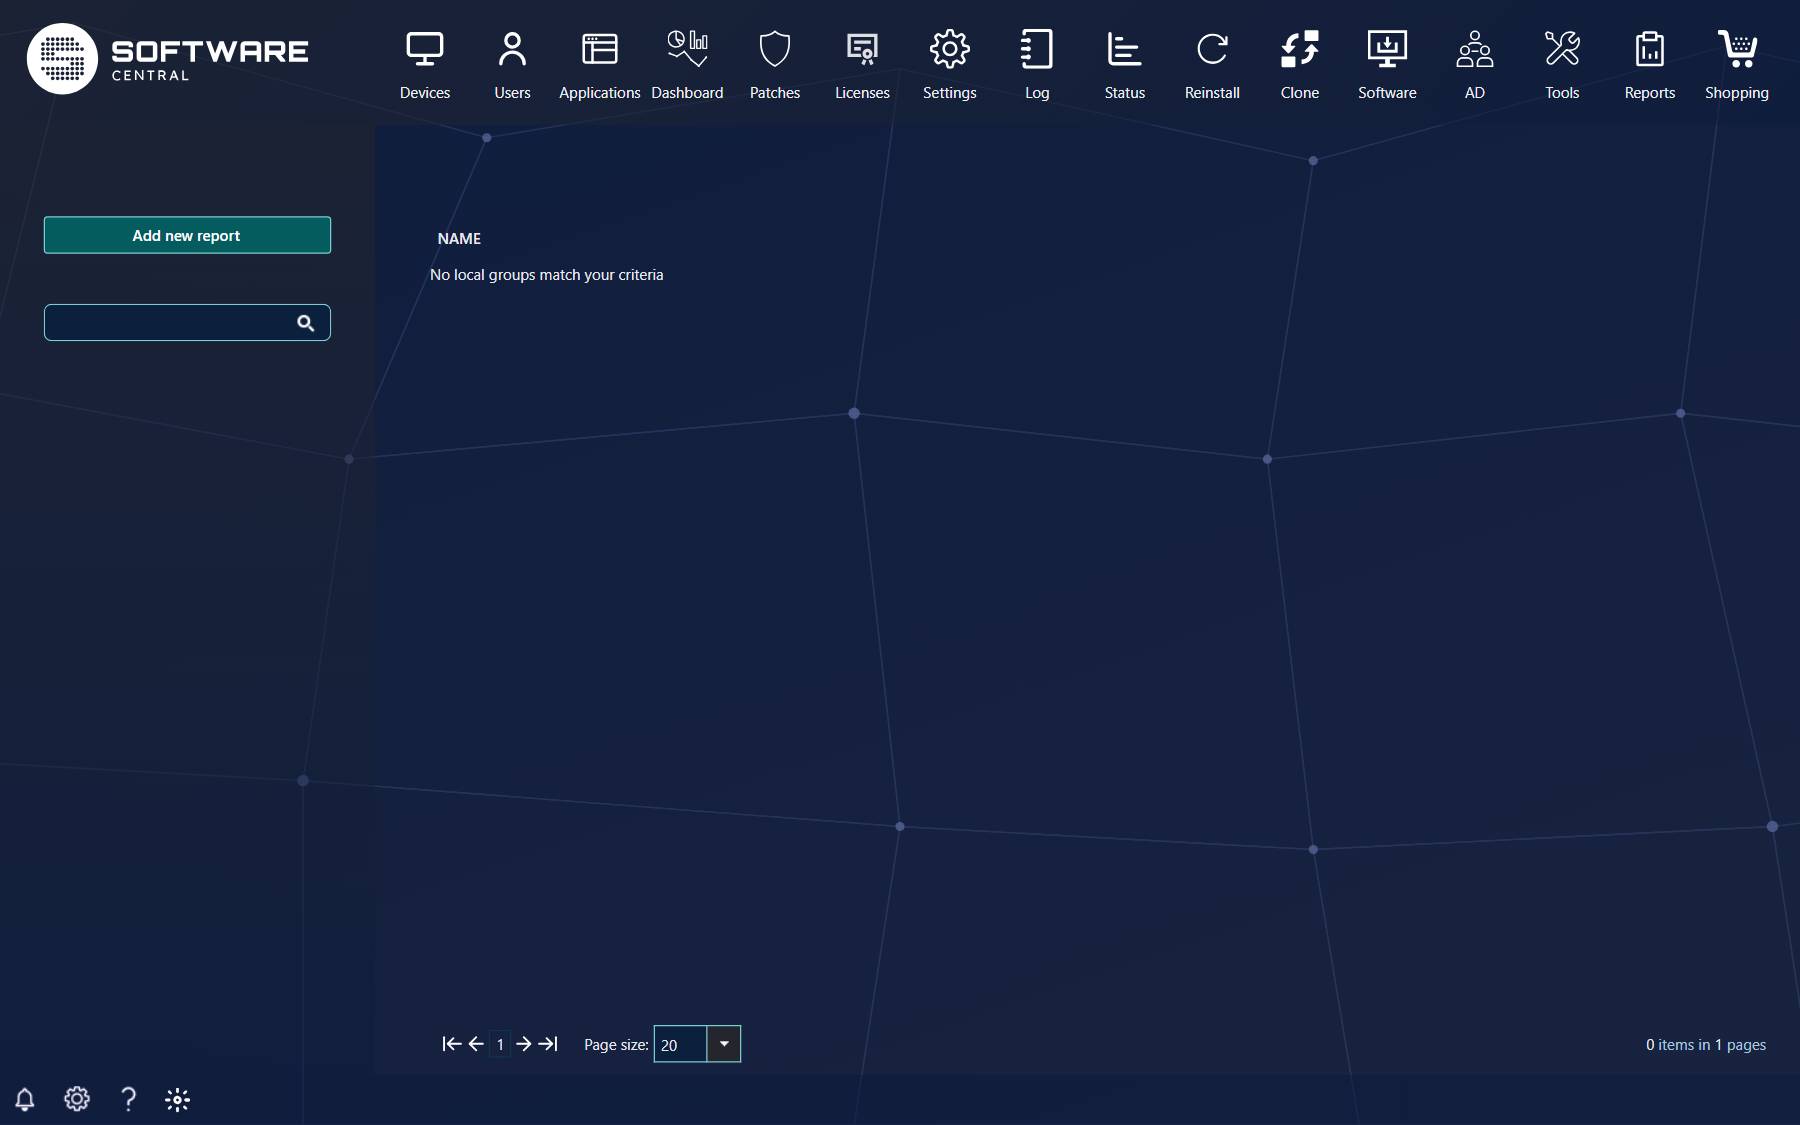

Which links you see depends on your role. Without the create, edit, delete or view rights, the matching button or links are hidden.
2 Add a new report
Click Add new report. The report window opens.
In this window, enter a name and a description of the report content. For specifying the data in the report, use the filters in the Report filter and result panel. The filters only show data from the local group jobs.
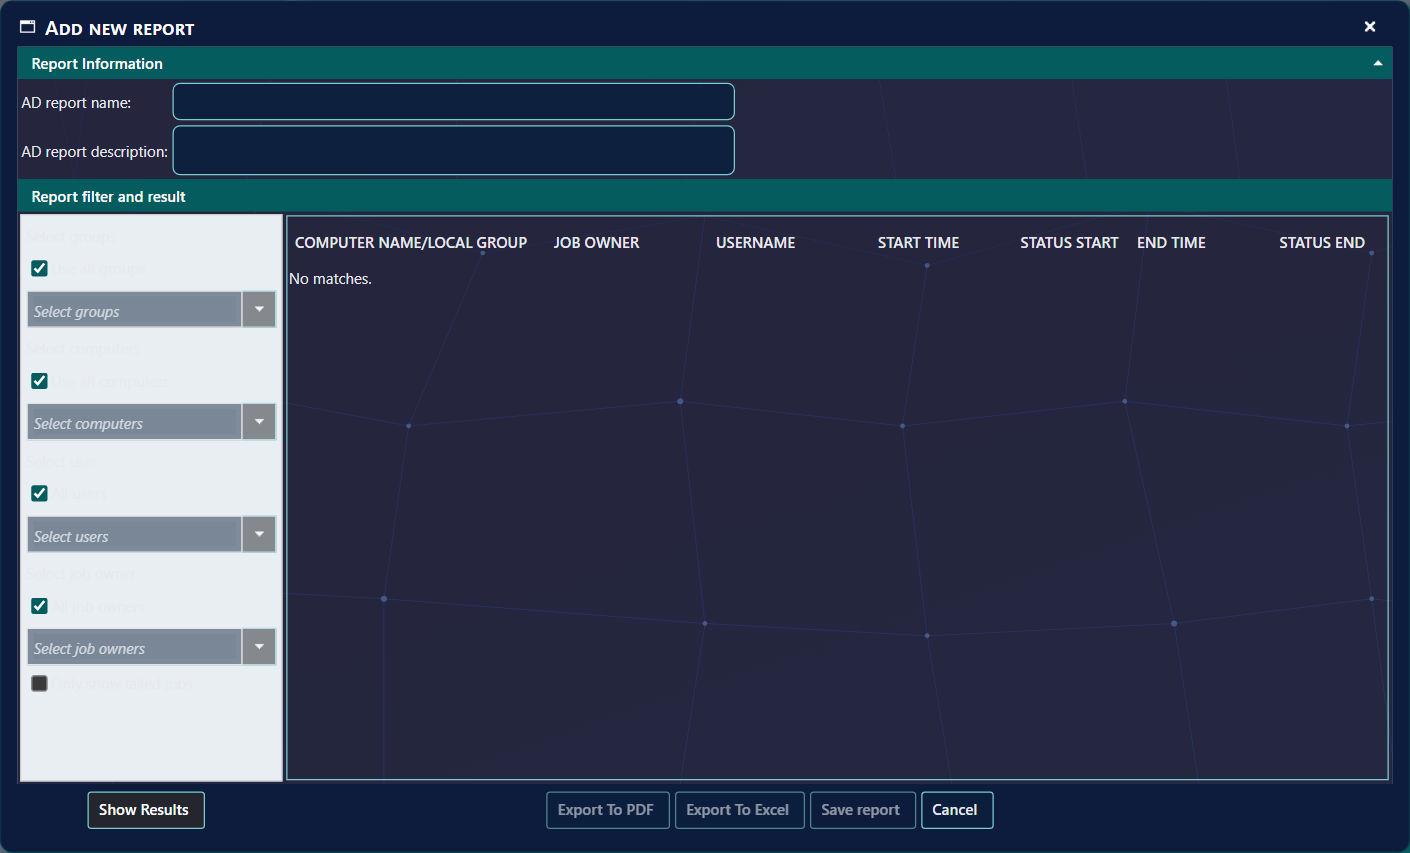
| Field or filter | What it does |
|---|---|
| AD report name | The name of the report. It is required and must be unique. |
| AD report description | A description of the report content. It is shown above the results when you view or export the report. |
| Use all groups / Select groups | Leave it ticked to include every local group. Untick it, then tick the groups in the drop-down. |
| Use all computers / Select computers | Leave it ticked to include every computer. Untick it, then tick the computers in the drop-down. |
| All users / Select users | Leave it ticked to include every user who was added to a group. Untick it, then tick the users in the drop-down. |
| All job owners / Select job owners | Leave it ticked to include every job owner. Untick it, then tick the job owners in the drop-down. |
| Only show failed jobs | Shows only the jobs that failed. |
3 Show results, export and save
Click Show Results to run the report with the filters you have chosen.
The result grid shows the columns Computer name/Local group, Job Owner, Username, Start Time, Status start, End Time and Status end. Times are shown in your own time zone.
Export To PDF, Export To Excel and Save report become available after Show Results has run with valid selections. Export saves the report in the format you choose. Save report keeps the report so you can view it again later.
| Button | What it does |
|---|---|
| Show Results | Runs the report with the current filters and shows the result grid. |
| Export To PDF | Exports the result grid as a PDF file with a header showing SoftwareCentral, the report name and the description. |
| Export To Excel | Exports the result grid as an Excel file. |
| Save report | Saves a new report. The window closes and the list is refreshed. The button is called Update report when you edit a report. |
| Cancel | Closes the window without saving. |
4 Edit a report
To edit an existing report, go to the main interface and select the wanted report in the middle of the interface, then click Edit on its row.
This opens the report window with the saved name, description and filters. Change what you need, then click Update report.
5 Delete a report
To delete an existing report, click Delete on its row in the main interface.
A window opens with the report name in its title, and the buttons Delete and Cancel. Click Delete to delete the report. Cancel keeps it.
6 View a report
Click View Report on a row to open the report with its current data.
The window shows the report name, the description and the result grid. Use Export To PDF or Export To Excel to save the result, and Close Report to close the window.
7 Best practice
- Give each right on its own. Create, edit, delete and view are separate roles. Give a user only the ones they need, so that a viewer cannot change or delete a report.
- Give each report a clear, unique name. The name must be unique, and it is the only way to find the report in the list.
- Use Only show failed jobs to check failures. It shows only the jobs that failed, which is the quickest way to see what did not work.
- Treat exported files as confidential. The PDF and Excel files contain computer names and user names.
8 Troubleshooting
| Symptom | Cause | What to do |
|---|---|---|
| "Missing name" | The AD report name box is empty when you save. | Enter a name and save again. |
| "Name already exist" | Another report already has that name. Names must be unique. | Choose a different name. |
| "Some selections is empty" | A filter is unticked (for example Use all groups), but no groups, computers, users or job owners are ticked. | Tick at least one item in that drop-down, or tick the matching Use all check box. |
| "No matches." | The filters match no local group jobs, or Only show failed jobs is ticked and no job failed. | Widen the filters, or untick Only show failed jobs, then click Show Results. |
| "No local groups match your criteria" | No report exists yet, or the quick find box filters all reports out. | Click Add new report, or clear the quick find box. |
| The Export To PDF, Export To Excel and Save report buttons are greyed out | Show Results has not run yet, or a filter is not valid. | Fix the filter message, then click Show Results. |