1 What a computer group is
A Computer Group is a group of computers that can be used in the multiple-computer interfaces, such as Manage Software on Multiple Resources.
SoftwareCentral can create and manage Computer Groups. A group is saved as a static query in ConfigMgr that lists the computers in it. SoftwareCentral keeps the groups in its own list, so you see and manage them in Computer Groups.
When you save a group, your security role is automatically granted access to view it. A group you delete is removed from the roles that had it.
2 Open Computer Groups
Open the Devices menu and choose Computer Groups. The list shows the groups you can see.

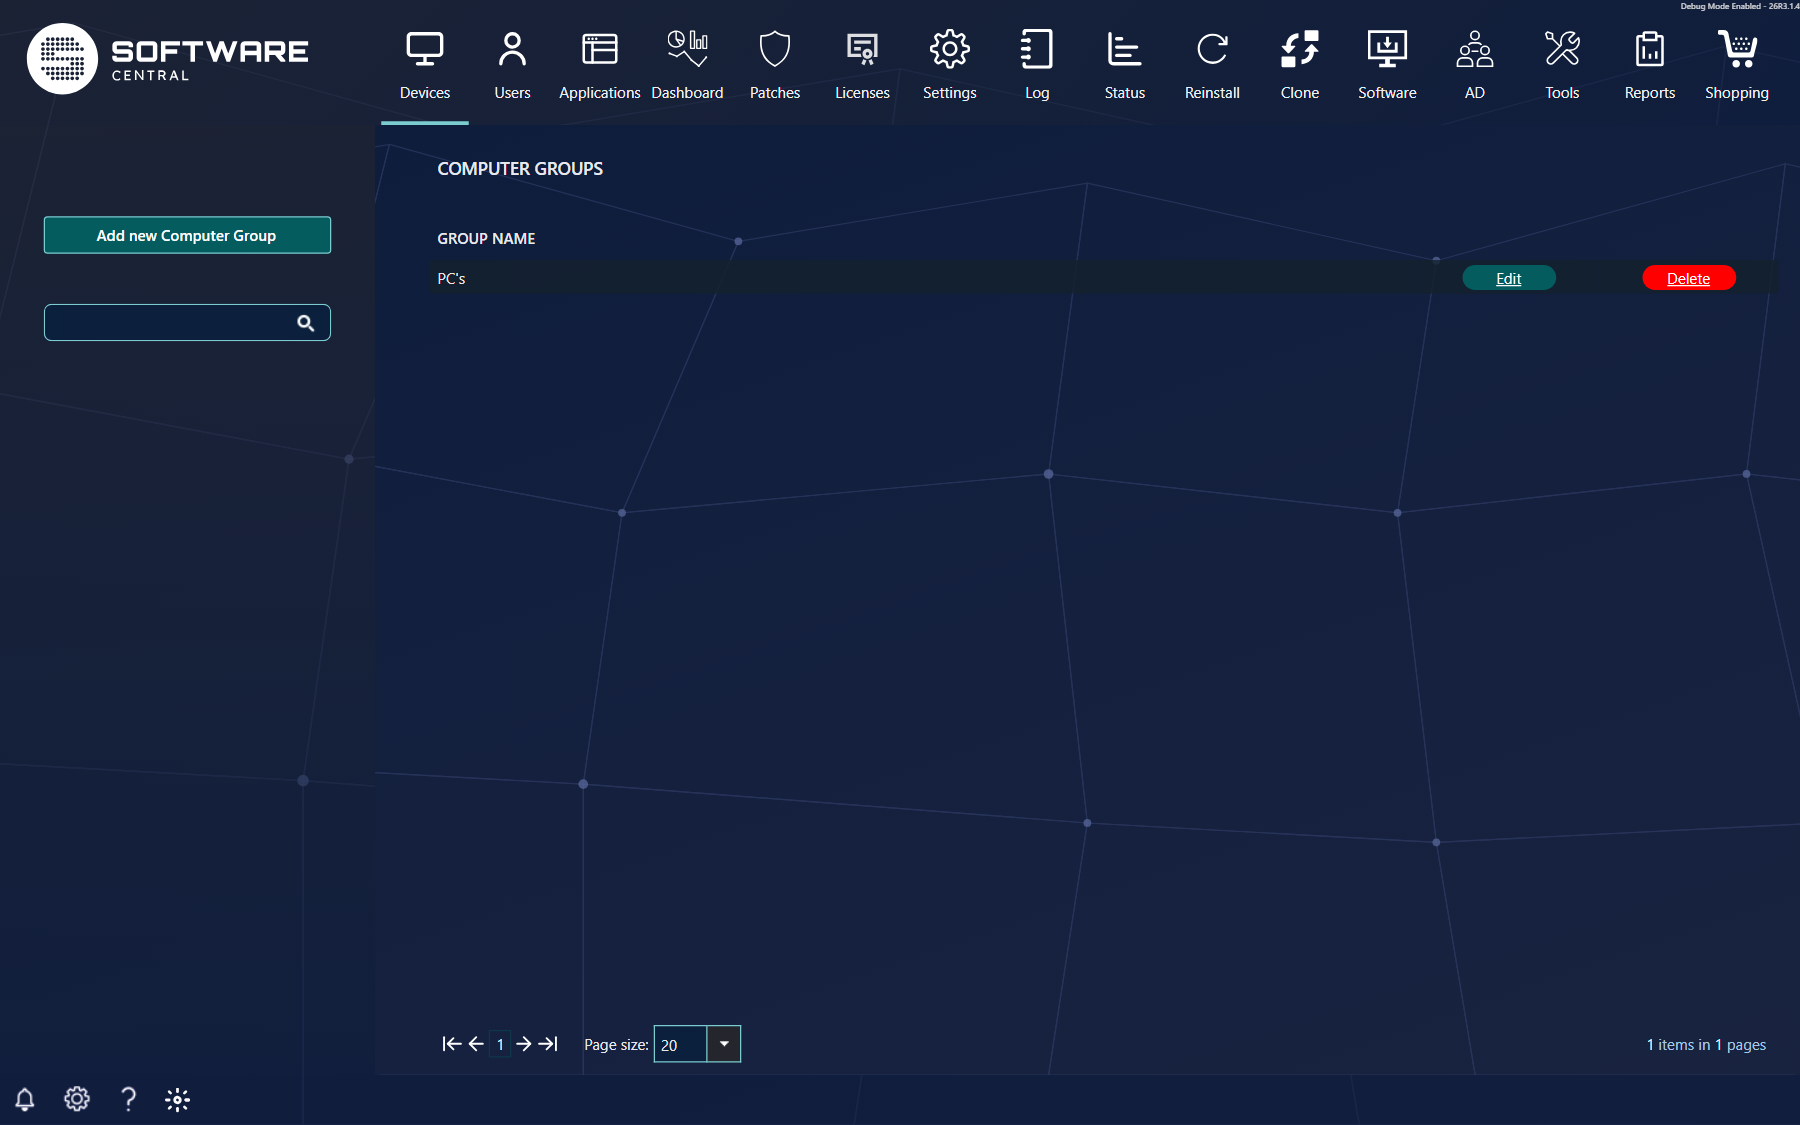
The search box on the left searches the group names. The list is shown in pages, and the page size is set at the bottom of the list.
3 Create a computer group
To create a Computer Group, click Add new Computer Group in the left menu. A new window opens.
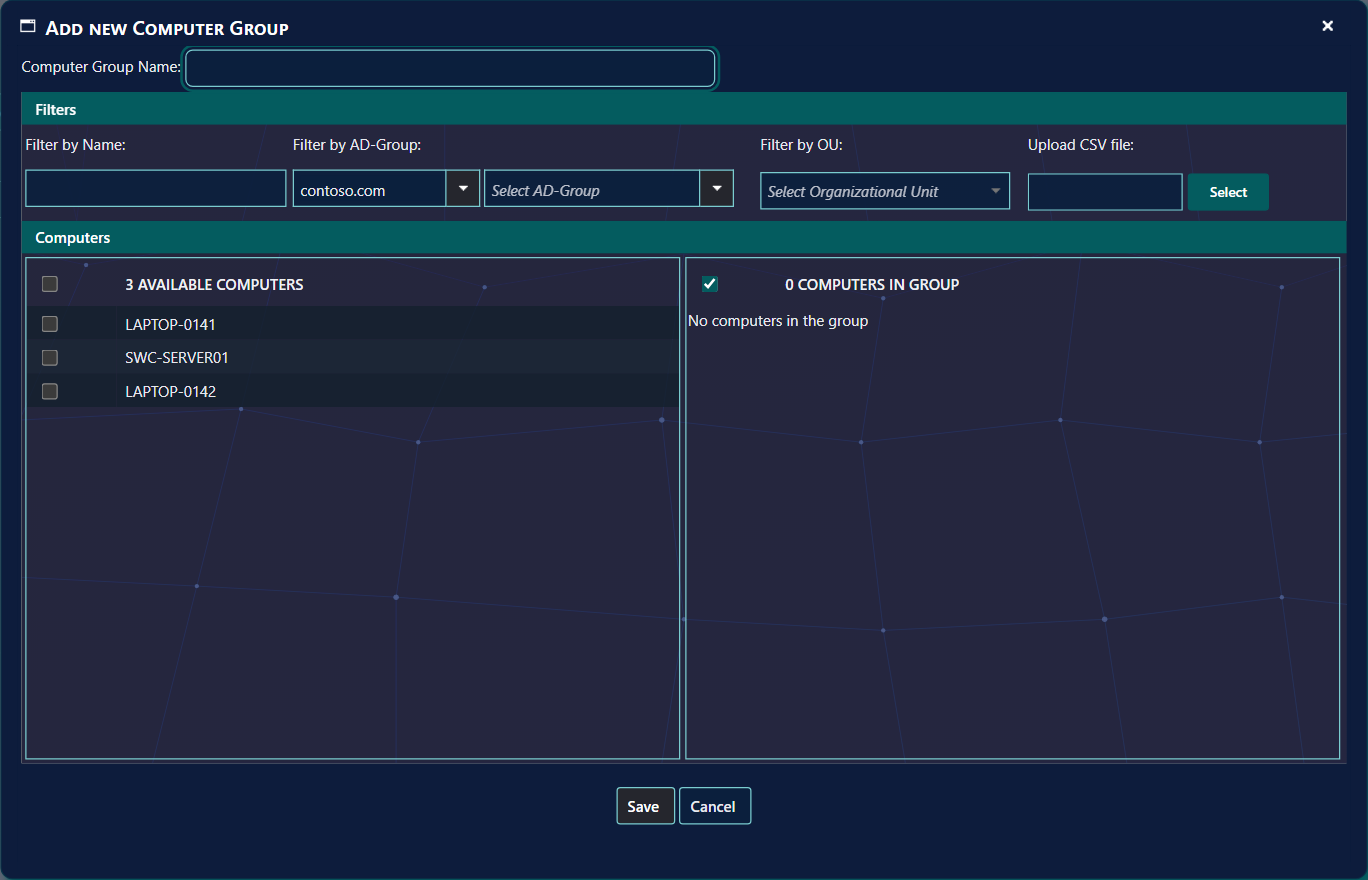
- Give the group a name in Computer Group Name. The name is required.
- Choose the computers. The Available Computers list shows a maximum of 100 computers per page. To see more, scroll to the bottom of the list and select the next page. Add a computer to the group by clicking the checkbox next to the computer name.
- Check the group. The Computers in Group list displays the computers that will be added to the group. Untick a computer to take it out again.
- Filter by name. The Available Computers list can be filtered by computer names. Type part of or the whole name of a single or series of computers in Filter by Name.
- Filter by AD-group. It is possible to filter the available computers by an AD-group. Choose the domain in Filter by AD-Group, then the group in Select AD-Group.
- Filter by OU. It is also possible to filter by an Organizational Unit, with Filter by OU.
- Upload a CSV file with a list of computer resource ids or computer names, with Select next to Upload CSV file. Separate the values by commas or semicolons, or use a new line for each item.
E.g.: PC089,PC090,PC091
Or:
16777219
16777222
16777225
The list in the file filters the Available Computers list. The computers are still added to the group by ticking them.
- Click Save to create the group. The window closes and the group is listed.
| Message | What it means |
|---|---|
| Please enter a name | The Computer Group Name is empty. Type a name and save again. |
| The name already exists | A group with this name is already in the list. Choose another name. |
| No computers selected | No computer is in the group. Tick at least one computer in the Available Computers list. |
4 Edit a computer group
Click Edit on the row of the group. It opens in the same window as when a new computer group is created, with the possibility to apply the same filters.
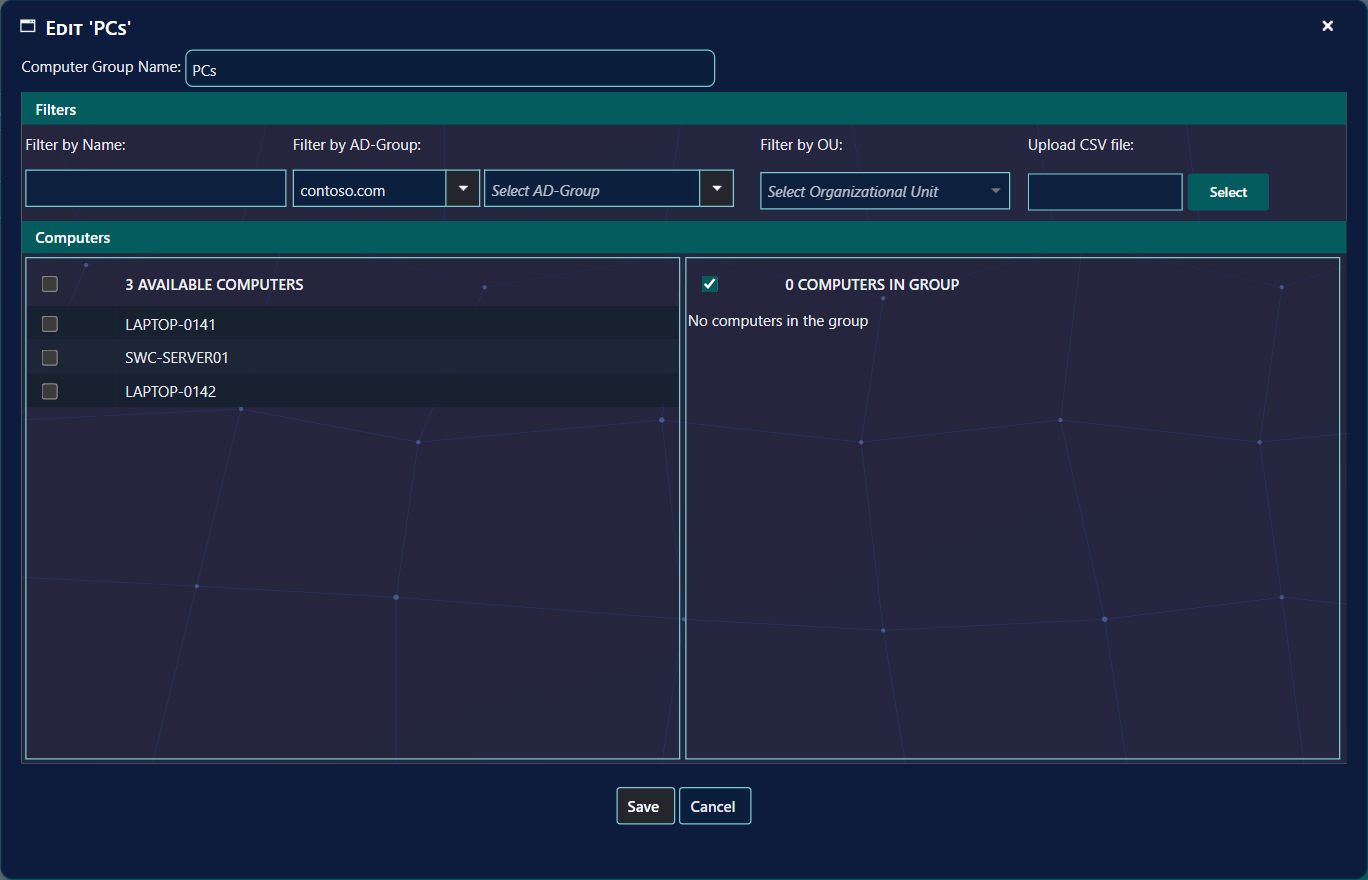
Change the computers in the group as in section 3, then click Save. The group keeps its name.
5 Delete a computer group
To delete the group, click the Delete button on its row.
A confirmation window opens with the name of the group. Click Delete in that window to remove the group, or Cancel to keep it. The computers are not deleted: only the group is removed, and the roles that had the group lose it.
6 Best practice
- Name the group for what it holds, for example the laptops of one site. A group cannot be renamed, so a clear name at the start saves creating it again.
- Build the group with filters first, then tick the computers you want, and check the list in Computers in Group before you save.
- Use a CSV file for a fixed list. Use one format per file: names, or resource ids.
- Delete the groups you no longer use, so the list stays short. Deleting a group also removes it from the security roles that had it.
7 Troubleshooting
| Symptom | Cause | What to do |
|---|---|---|
| "Please enter a name" | The Computer Group Name box is empty. | Type a name. |
| "The name already exists" | A group with this name is already listed. | Choose another name. |
| "No computers selected" | The group has no computers. | Tick at least one computer, then save. |
| "No computers match your search criteria" | The filters, the search or the CSV file leave no computer in Available Computers. | Clear the filters, or check the names in the CSV file. |
| "No Computer Groups found" | There are no groups you can see, or the search matches none. | Clear the search box, or add a group. |